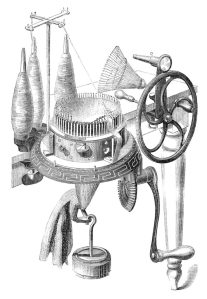
Vintage Woodcut from 1871 – English Mechanic and World of Science – Antique Image
Here is a fascinating post about knitting at the Great Exhibition of 1851, with some interesting pictures!
Vintage Woodcut from 1871 – English Mechanic and World of Science – Antique Image
Here is a fascinating post about knitting at the Great Exhibition of 1851, with some interesting pictures!
 My living room is on the ground floor of a windmill. The walls are the 1798 brickwork, with patches from wear and tear since. In a modern home, obviously we need cables to get power upstairs, and there are radiators up there. And the previous owners had an idea about an ensuite bathroom in the top room. Normally, of course, all this gubbins would be in the wall. Someone did suggest cutting out the brickwork and bricking it all in, so the wall was flat. On such a large drop, I think that is going to be really difficult to blend in, particularly as this wall is circular, and it slopes in at about 85°, so it would be a difficult job.
The subject of boxing it in comes up regularly, but I don’t like that idea. For the same reasons it would be a difficult job, but that isn’t my biggest worry. I think if you did a really good job, it might look too modern and clinical, and if you tried to blend it in a bit, it might just look scruffy. And, as you would expect from the interior of an old industrial building, the surface of the brickwork is nothing like smooth.
 So I decided to go down the textile route. Two surplus curtain pole hooks (you get strange leftovers in a quirky house), a piece of dowelling, and a long strip of fabric of some sort. I spent some time dithering about what sort, and how wide. I decided I wanted hessian, as that room was originally used to put the flour into sacks. Then I found Hobbycraft sell a long narrow piece of hessian, with fringed edges. The width fulfulled all the requirements, so I sewed a channel for the dowel in the top, hemstitched the sides to stop the fringe from fraying, and did some drawn thread embroidery across the bottom. This was surprisingly quick to do, as the weave is fairly open, so taking even one thread out makes a decent space. This means that the bottom of the banner looks as though I have finished it, but it isn’t a key part of the overall design. At the moment, the bottom is behind a nest of tables, but you never know how long that will last.
For some time, this blank canvas has been hanging while I think. Even just as a plain piece of fabric, it makes a huge difference to the room. I was going to keep to sacking and unbleached calico for the colour range. The first idea was a silhouette of a windmill at the top, with a winding road through the fields leading up to it, and perhaps a miller with a sack on his back.
Then I found a book with a picture of this mill with its sails still on. I traced it to get a sketch outline, and took it to a copy shop to get it A3 size. The piece of paper was pinned on the top of the hessian for about 18 months. The windmill has much more detail than I had originally planned. I could see how I could work the windmill, but I couldn’t work out how to do the rest so it would all blend together.
 Eventually, I decided that I liked the windmill idea, and I would make a start and think the rest out later. I traced the sails and fan mechanism onto ordinary paper, and transferred the shapes to calico by machining through using a small stitch. The perforated paper can then be torn off, leaving the pattern. For the solid shapes, I appliqued cream felt. The more flimsy details I embroidered by hand, so I could control the width of the lines.
The building is two pieces of calico, seamed together. I cut out the shape in wadding, and pinned it inside (with the pins on the right side) before turning it the right way out. This manoeuver was a bit awkward, but resulted in a ready stuffed shape. I cut the cap from felt, to avoid struggling with the curved turnings and the difficult shape at the top. I then pinned on another tracing of the sketch, and quilted through it to get the doors and windows. This worked well, but I doubted it would show up from floor level, so I went round again with a darker thread, and put some planks in the door. This was good close up, but when it was in position, you couldn’t see the windows. I’ve coloued them with a bit of soft pencil.
Then I came upon a jelly roll that I’ve been playing with for ages, and realised it would make wonderful ploughed fields. Because I was limited to furrows about two inches wide, the finished width of a jelly roll strip, the field had to be shorter than I would have liked. I had thought of writing the miller’s names on the furrows, but as the field was so short, I decided to use the same fabrics to make a time line. I have one column for millers, another for owners, and the rest is taken up with local dates, like the building of other local mills (all later) and the coming of the railway to the nearby town.
Some of my dates are estimates, which may be clarified by further research, but at a scale of 2 inches per decade there is a limit to how accurate I can be. If I cut my strips narrower, I could do something else with my scale, but it could make the background too busy, and distract from the embroidery. I thought about using 5 years for 2 inches, but:
Having decided on a structure, I sewed the strips together and added the dates and lettering freehand. I filled in the spaces with a few relevant motifs.
There was still some space at the bottom that is partly visible, so it needed filling. A couple of patchwork blocks with a windmill theme filled in the space nicely, and they blend in because I’ve used fabric from the same jelly roll.


A few tassles finished off the dowelling. I was planning to go to town more with this, but I had forgotten the slope. Of course, cords hanging vertically, so by the time you get to the tassle, it is well away from the wall.
The slope is also the cause of the uneven hang. If it hangs vertically, the gap between the bottom and the wall looks silly. I’ve attached it loosely to whatever is available: the curtain pole, various hooks, and in a couple of places a ribbon runs behind those cables. I don’t want to stiffen it, as that will add to the weight, so I’m just living with it. In real life, it is considerably less noticable than on the photos.
Right. Now I need something similar, but shorter, for the spare bedroom on the floor above.
 In these interesting times, when many of us are sewing face masks and scrubs, here is a reminder of how to check your sewing machine tension.
Small changes can make a big difference. Yes, it is worth fiddling around for a couple of moments to get it right.

My now not so new sewing machine came with a twin needle thingy.
When I get round to it, I’m going to play with it. When that moment comes, I’ll be starting with this post on everything you need to know about sewing with a twin needle.
 This is a point that I overlooked for a long time.
When you sew following the grain of the fabric, you reduce the distortion. Most of us have at some point managed to stretch the edge of the fabric when it has been cut on the bias, across the grain. We know that stay stitching, running a line of stitches round a curve or a diagonal edge, stops the fabric from distorting when it is handled.
This idea is based on a similar principle. So:
For a long time, I used the quickest method. I’d sew down one side seam and up the other, or right round the neck. Sometimes it was absolutely fine. Sometimes the result was just a little odd. Now I know why.
Find out more about sewing directionally here.

Today I’ve found a nice little guide to how to do some embroidery stitches. These stitches can be combuined in all sorts of ways to make up lots of designs.
 Here is a nice, but short, video about traditional indigo processes. With some lovely photography. Just make sure you maximize it on your screen so you can see the subtitles.
But you won’t see the technique in this picture with the traditional techniques. This is done using bulldog clips.
 At the end of last summer, I had a summer house built on the terrace, over the back door. I wanted somewhere to sit and enjoy the garden on the many days when it is too windy to sit outside. I was thinking of summer evenings, but actually I’ve been out there, door firmly shut, on sunny afternoons already. We are calling it the south wing.
Fortunately, I decided to furnish it as I saw things I liked, rather than wait until summer, so I have beaten the lockdown there. I have a bits bowl out there for trimmings of thread and what not, but a few days ago I was finishing some weaving out there. And loom waste was too much for the system. I need a proper bin. Does this fall into the definition of essentual purchases? Not really. Can I make do with a box for now? Well yes, but there has to be a better way.
Then I remembered pictures in old books of woven newspaper. So I went online and had a look. There are two ways of doing this:
So I used my rotary cutter to make a pile of 2 inch wide strips, which seemed sensible. I folded them in half, which didn’t seem firm enough. So I folded them again to make half inch strips. That seemed better.
 Now I have experience of basket weaving. I made a waste paper basket at school, when I was about 9 or 10, and that basket is still in service in the living room. I also had a go when I needed baskets for my dolls’ house. That was less successful, as I couldn’t balance everything to get it going.
So applying my vast knowledge, I set to, making a square base. I stapled the first group of strips together to avoid everything slipping all over the place, and that worked fine, and progress was good. Then I got to the part where I needed to start the sides. That needs some tension, to pull everything in. And that is where the trouble started.
By this stage, I was getting towards the end of my first strips of newspaper. The instructions I had seen said you just slot the next strip into the fold. That would have worked on the flat base, where there was no tension, but it wasn’t so easy when I was trying to turn the corner. I tried paper clips, but they didn’t work. The new strip just slipped out again. Staples did the trick. Initially, I thought I would take the staples out when things were more settled, but I have decided it isn’t worth the risk.
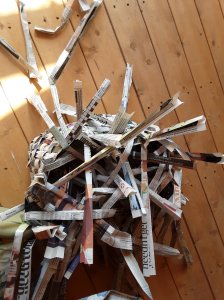
Weaving in progress
Things were easier once I’d turned the corner, but the next problem came when I started to add new uprights. Not only was it difficult to keep them in place, but also they flopped about. As you can see, I ended up with a vast tangled mass of long strips. A couple of times when I put it down, I couldn’t find the correct end to keep going. I got round this by using a small bulldog clip to hold my place.
I had planned to make it taller, but I wasn’t sure whether it would be firm enough. I got to a stage to where several uprights were coming to an end, so I decided to give up. I needed a firm top edge, to compensate for the unexpected flexibility. Anything technical, where you tuck in the ends seemed too risky. I’d probably tear things at a crucial place. I thought a bound edge was worth a try.
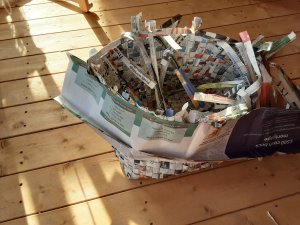
Finishing the top edge
I cut a couple of strips 6 inches wide, because that is the width of my rotary cutter ruler. I used three layers, and folded under a “hem” of an inch on each long edge, using the ruler. I intended to glue the band on, but I decided that it was too ambitious to tidy up the ends at the same time I was gluing. I treated the strip as a piece of bias binding. I lined one long edge of the strip up with the top of the weaving, which I tidied up as I worked round, stapling the strip down as I went.
Turning the binding strip over the top of the basket.
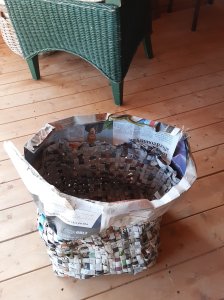
Turning the strip up along the fold I’d already made was surprisingly hard. I was glad I’d already made the fold before I started, and that I had some strength frm the three layers. Turning the strip over to the inside of the basket was also difficult.
At the moment, the inside is held down with Scotch tape, which I don’t think will last, but I’m not sure how to make it more permanent. That will need some thought, and I’ll get round to it at some point. For now, at least I have a functioning bin.
If I do this again, I will use wider stripe to make the result firmer. I think the minimum should be to cut 4 inches wide, and folded twice to make an inch strip for weaving. That would be flexible to work with, but firmer when it is done. It would be considerably easier to get tension, and to finish the upper edge.
Sometimes progress is not a good thing. For example, “improving” the way we obtain indigo colour by using a synthetic substitute introduced all sorts of substances we now know are harmful to the process.
This post on making beautiful colours without toxic chemicals shows how genetically engineering bacteria to mirror the way the Japanese indigo plant makes colour may help.
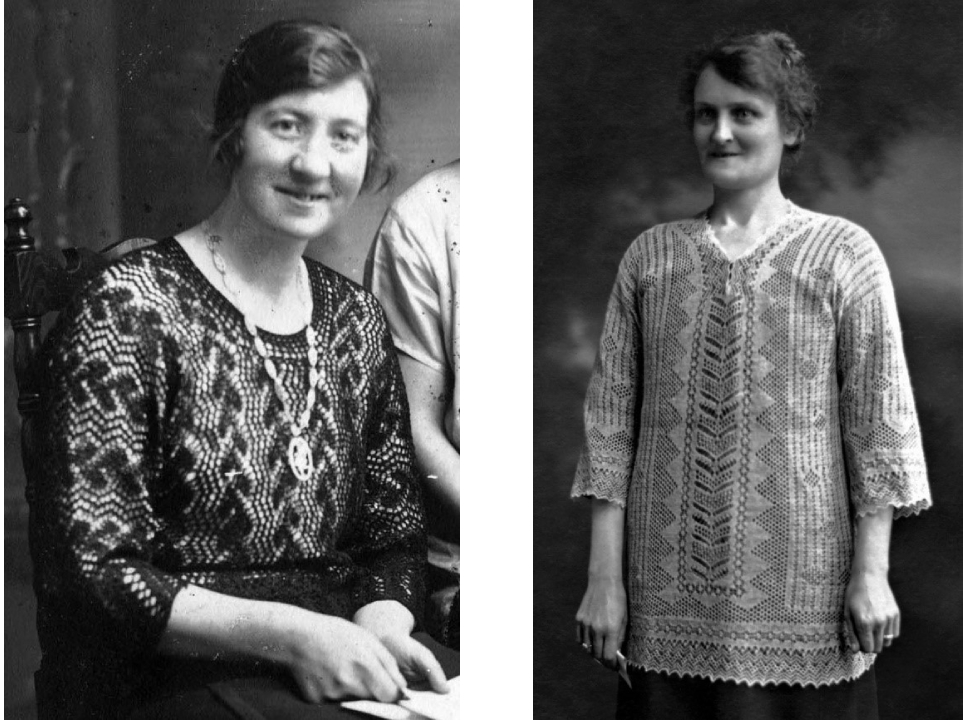
This is following on with the theme of knitting from the Northern Isles.
When you see knitted lace, it is usually an edging for something, or a scarf or shawl.
But as these pictures show, that was not always the case. This post about lace blouses shows the potential for this technique.
Although given my history of wrecking shetland lace scarves by getting them caught in things, I don’t think I’ll be going in that direction.
And by the way, if you are ever in Shetland, you really must go to the Shetland Museum.

